用 Algolia DocSearch 为网站添加搜索功能
参考资料:
步骤
- ★ 如何在 Docusaurus 中使用 Algolia 實作搜尋功能 (Docusaurus Algolia)
- ★ 手动给docusaurus添加一个搜索
- ★ 如何手动跑algolia的爬虫来打造自己的站点搜索呢🤔
- ★ 给你的网站添加Algolia全文索引吧
- Docusaurus 官方文档——使用 Algolia DocSearch
- Algolia DocSearch 官方文档
错误
步骤
1. 安装 DocSearch 包
在你的项目目录下打开命令行窗口,输入以下命令,安装 DocSearch 包
npm install @docsearch/react@3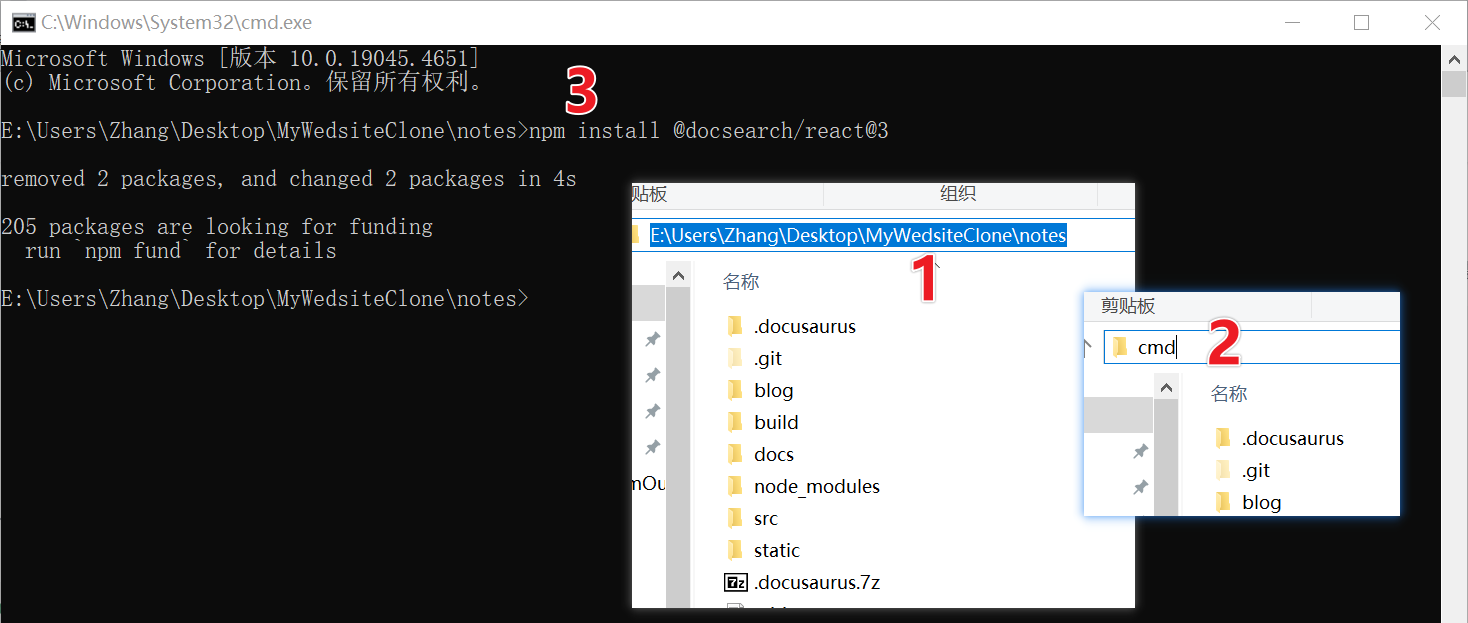
如果安装成功的话,package.json 里会多一行
"@docsearch/react": "^xxx",package.json...
"dependencies": {
"@docsearch/react": "^3.6.1",
"@docusaurus/core": "2.4.3",
"@docusaurus/preset-classic": "2.4.3",
"@mdx-js/react": "^1.6.22",
"clsx": "^1.2.1",
"prism-react-renderer": "^1.3.5",
"react": "^17.0.2",
"react-dom": "^17.0.2"
...
},
...
2. 修改 docusaurus.config.js
在 docusaurus.config.js 中的 themeConfig 里添加高亮的代码部分:
docusaurus.config.js...
themeConfig:
/** @type {import('@docusaurus/preset-classic').ThemeConfig} */
({
algolia:{
// Algolia 提供的应用 ID
appId: 'YOUR_APP_ID',
// 公开 API 密钥:提交它没有危险
apiKey: 'YOUR_SEARCH_API_KEY',
indexName: 'YOUR_INDEX_NAME',
},
// Replace with your project's social card
image: 'img/docusaurus-social-card.jpg',
navbar: {
title: 'Zhang',//改这里,是Mysite
logo: {
alt: 'My Site Logo',
src: 'img/logo.svg',//这里是导航栏的logo
},
items: [
{
type: 'docSidebar',
sidebarId: 'tutorialSidebar',
position: 'left',
label: '计算机',//这里是Tutorial
},
...
}),
...添加了 algolia:{} 后,你会发现 本地构建的 localhost:3000 网站出错了

不用管它,把网页关闭,重新 npm start 一下,看!右上角多了个搜索框!
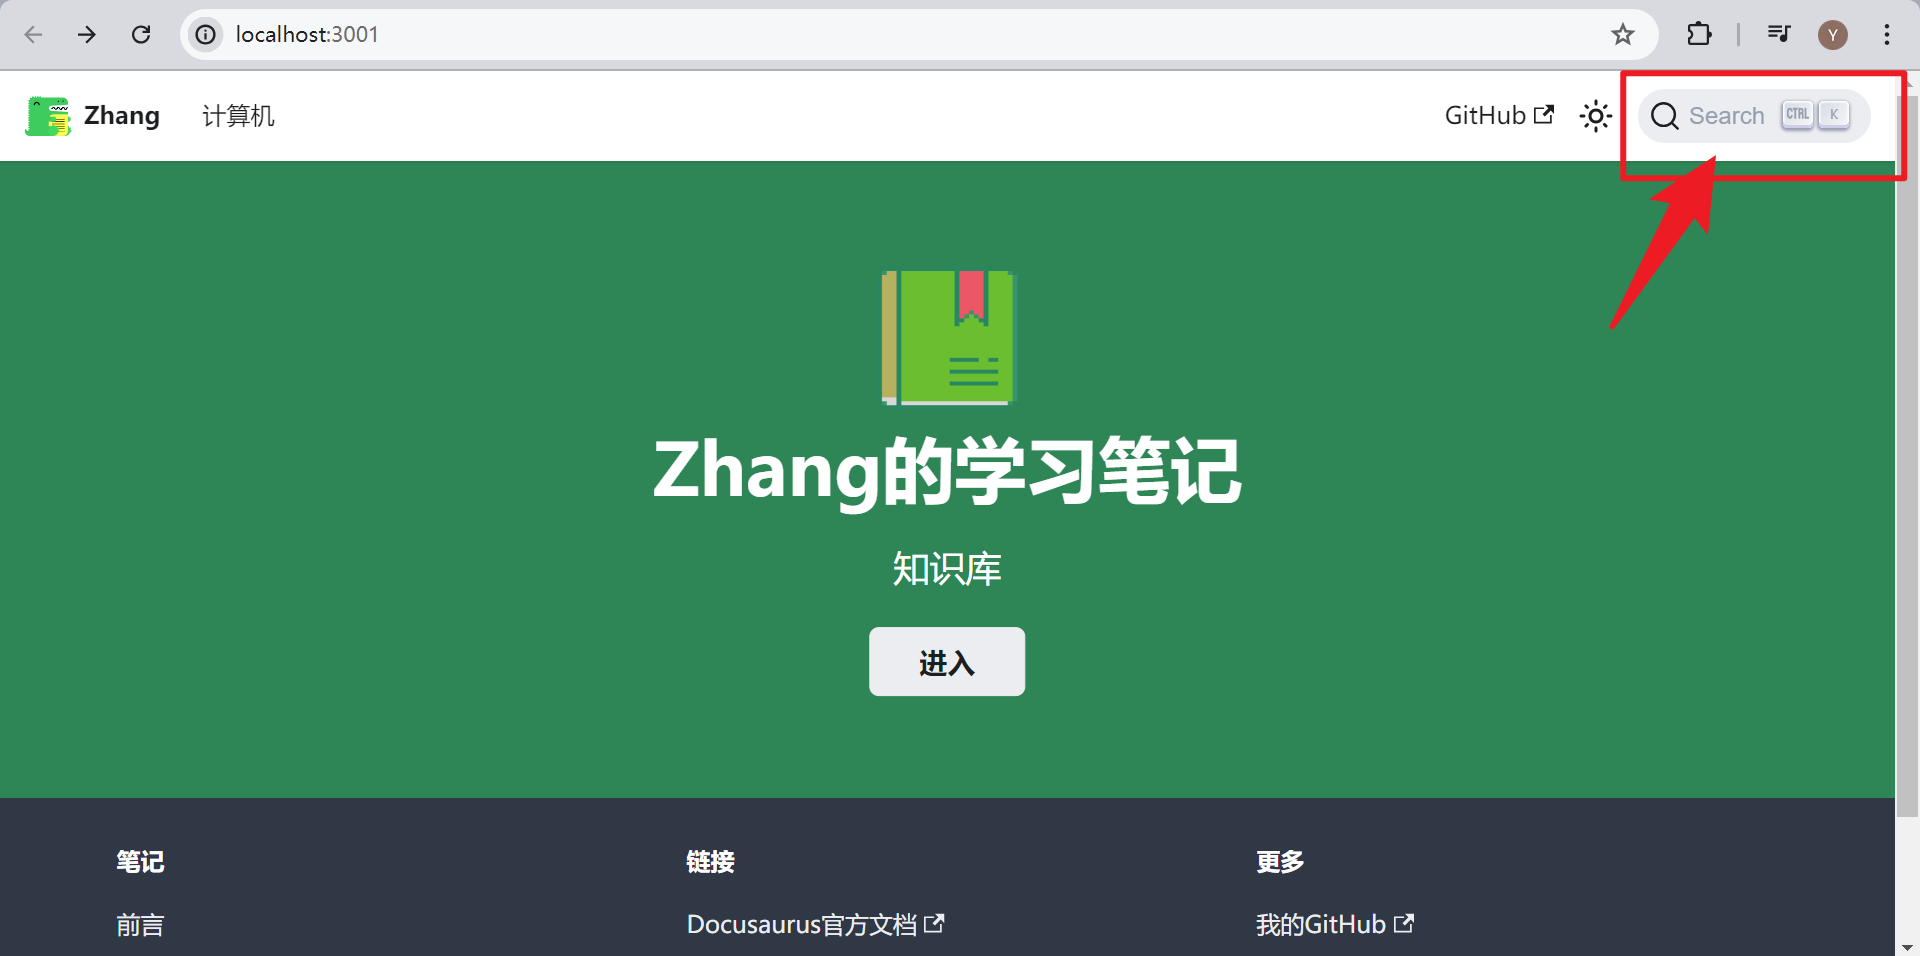
不过现在它就是个摆设,还不能搜出东西来,需要进行下一步配置
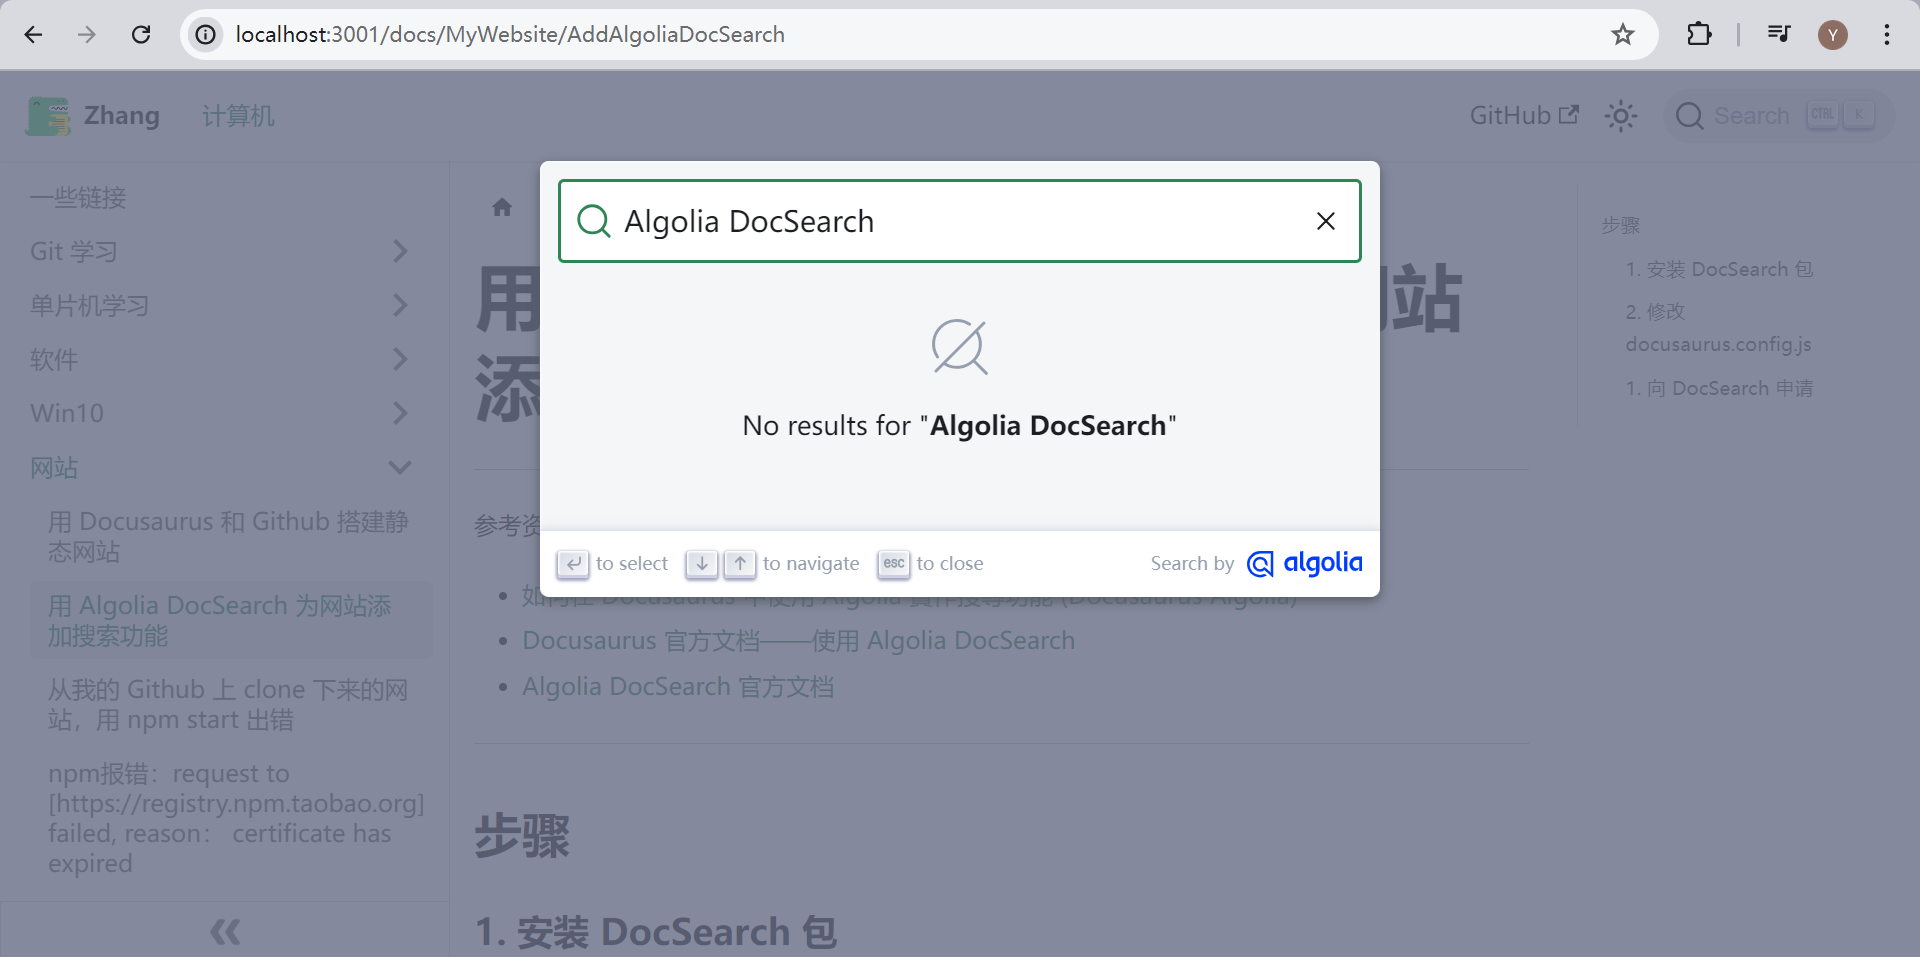
3. 注册、登陆 Algolia,获取appID、apiKey
1. 登陆 Algolia
点击 → Algolia 官网链接 ← ,打开后往下划,可以用 Github 注册
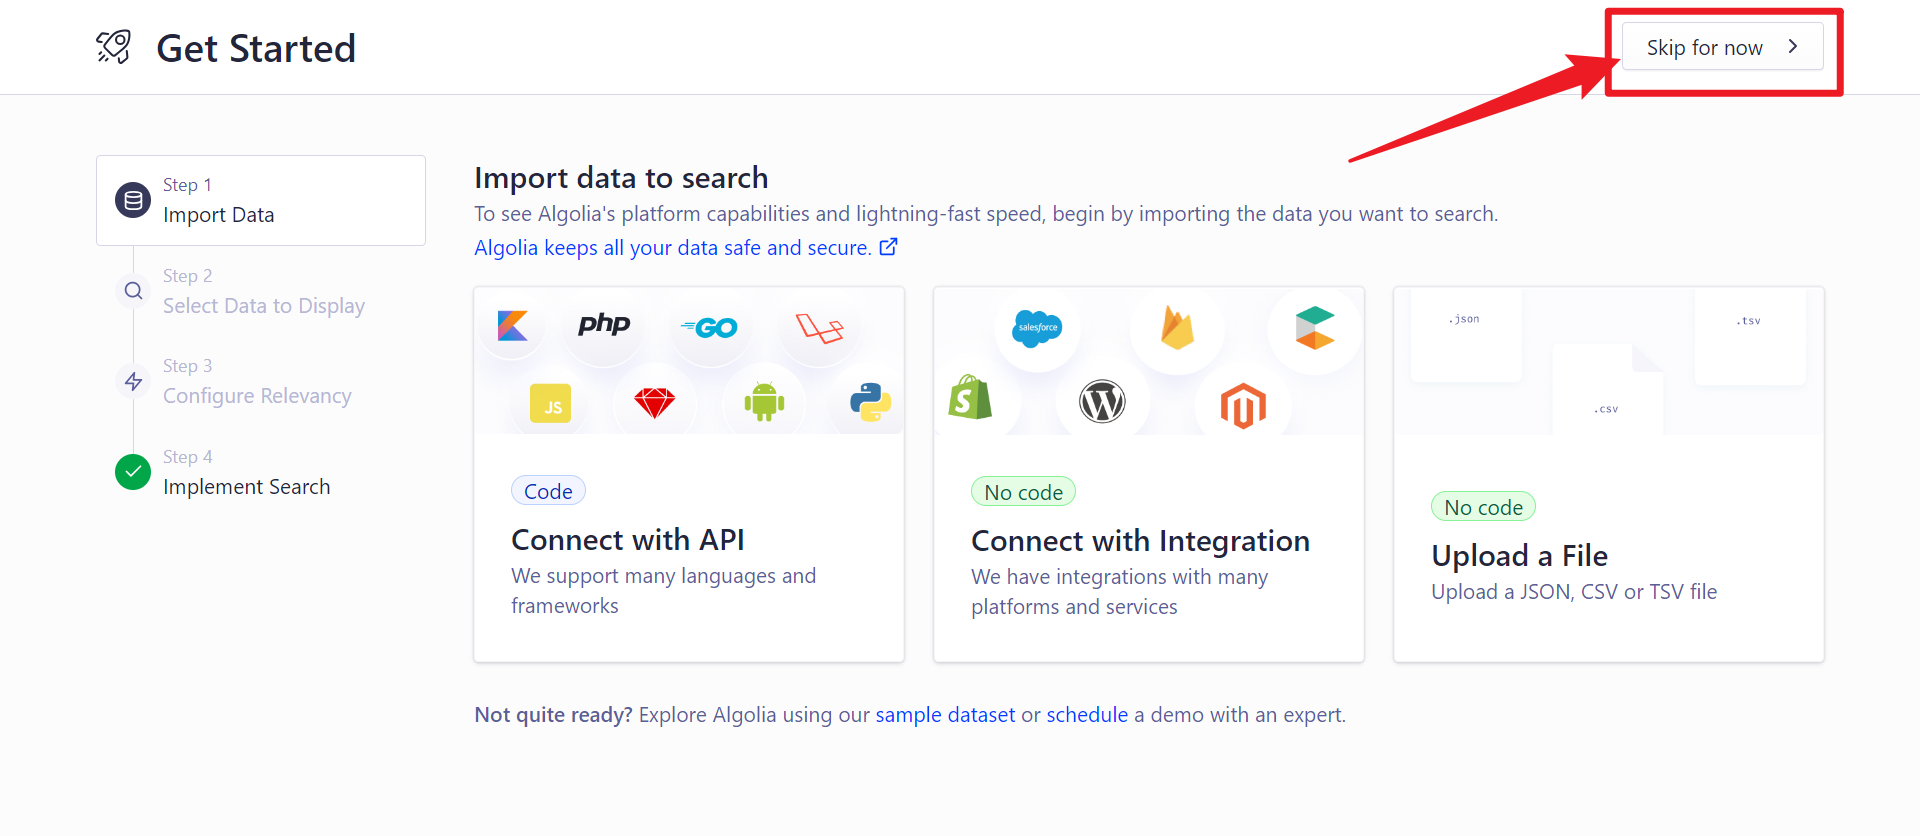
如果显示让你 Get Started ,不用管,点击右上角的 Skip for now
2. 创建 Application
登进去后,点击左下角的 settings -> Applications -> Create Application
最后选没有(Contact us)的
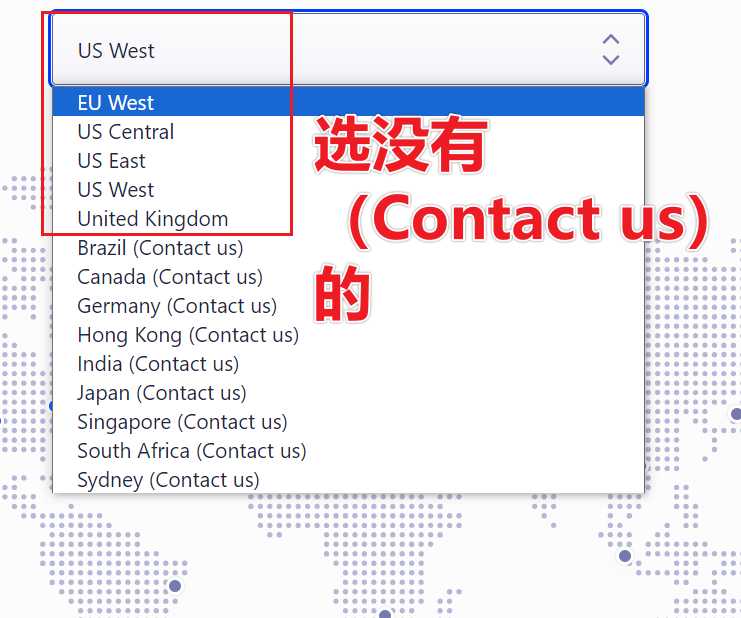
如果显示让你 Get Started ,不用管,点击右上角的 Skip for now
在 settings -> Applications ,新建的 Application 右边点三个点,可以重命名
3. 新建 index
点击左边导航栏中的 Search , 接着点击 Create Index ,新建一个 index
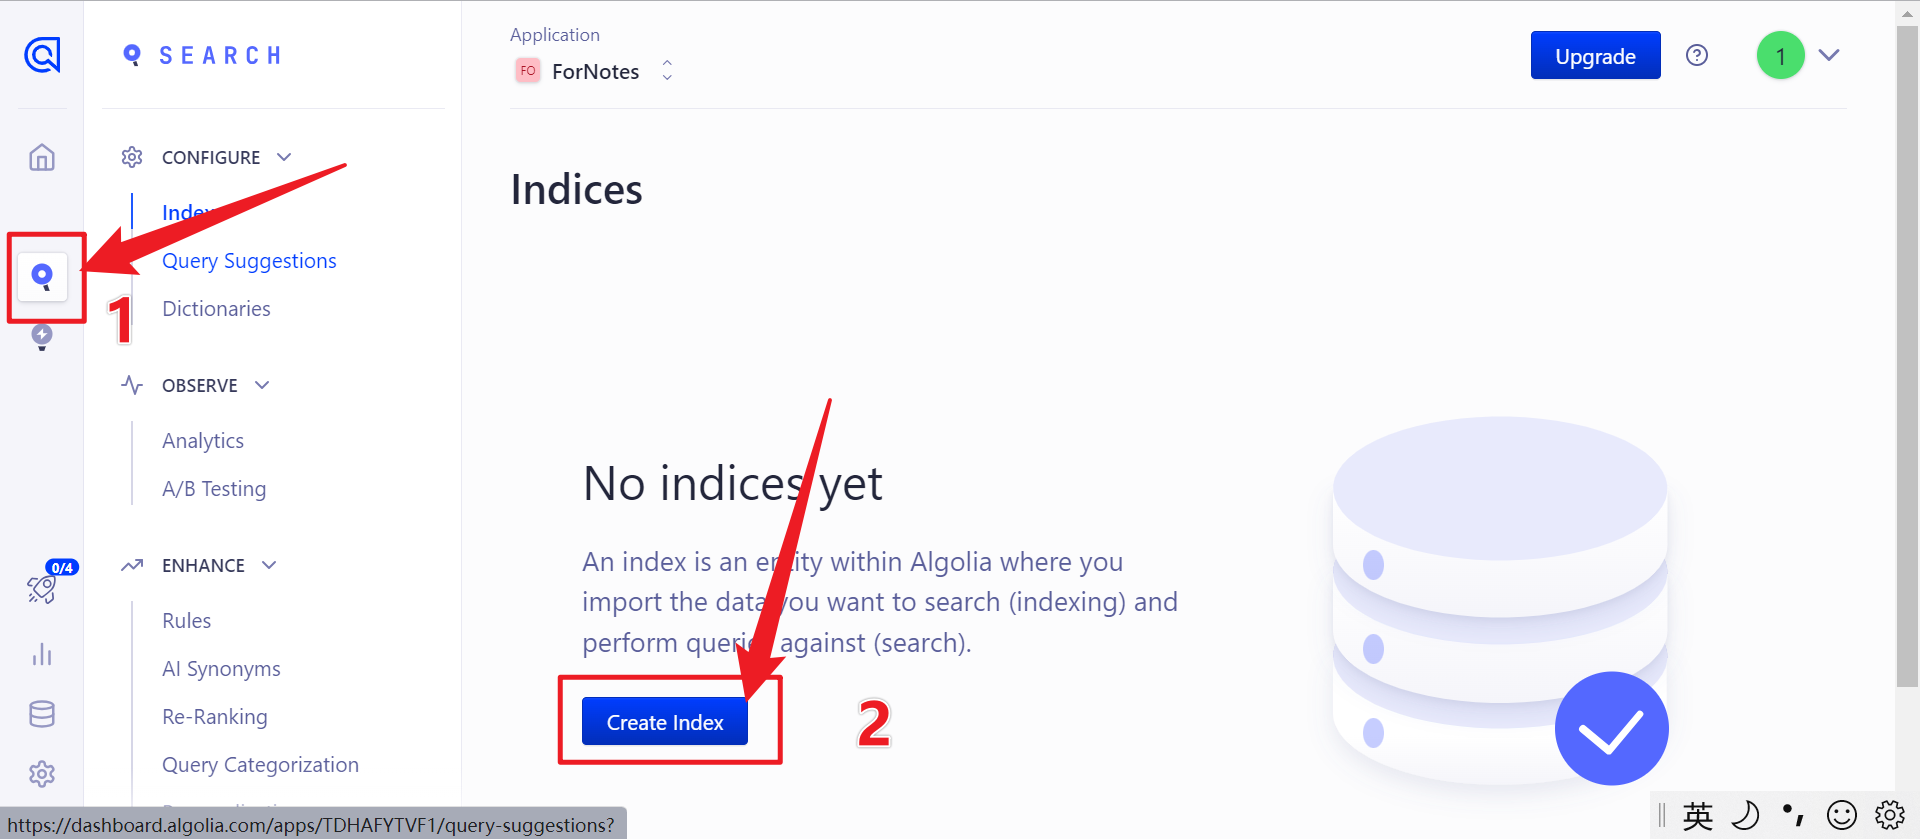
4. 获取 appID、apiKey
(点我跳回设置 .env )
点击 Settings -> APIKeys ,在这里可以找到 Application ID 和 API Key
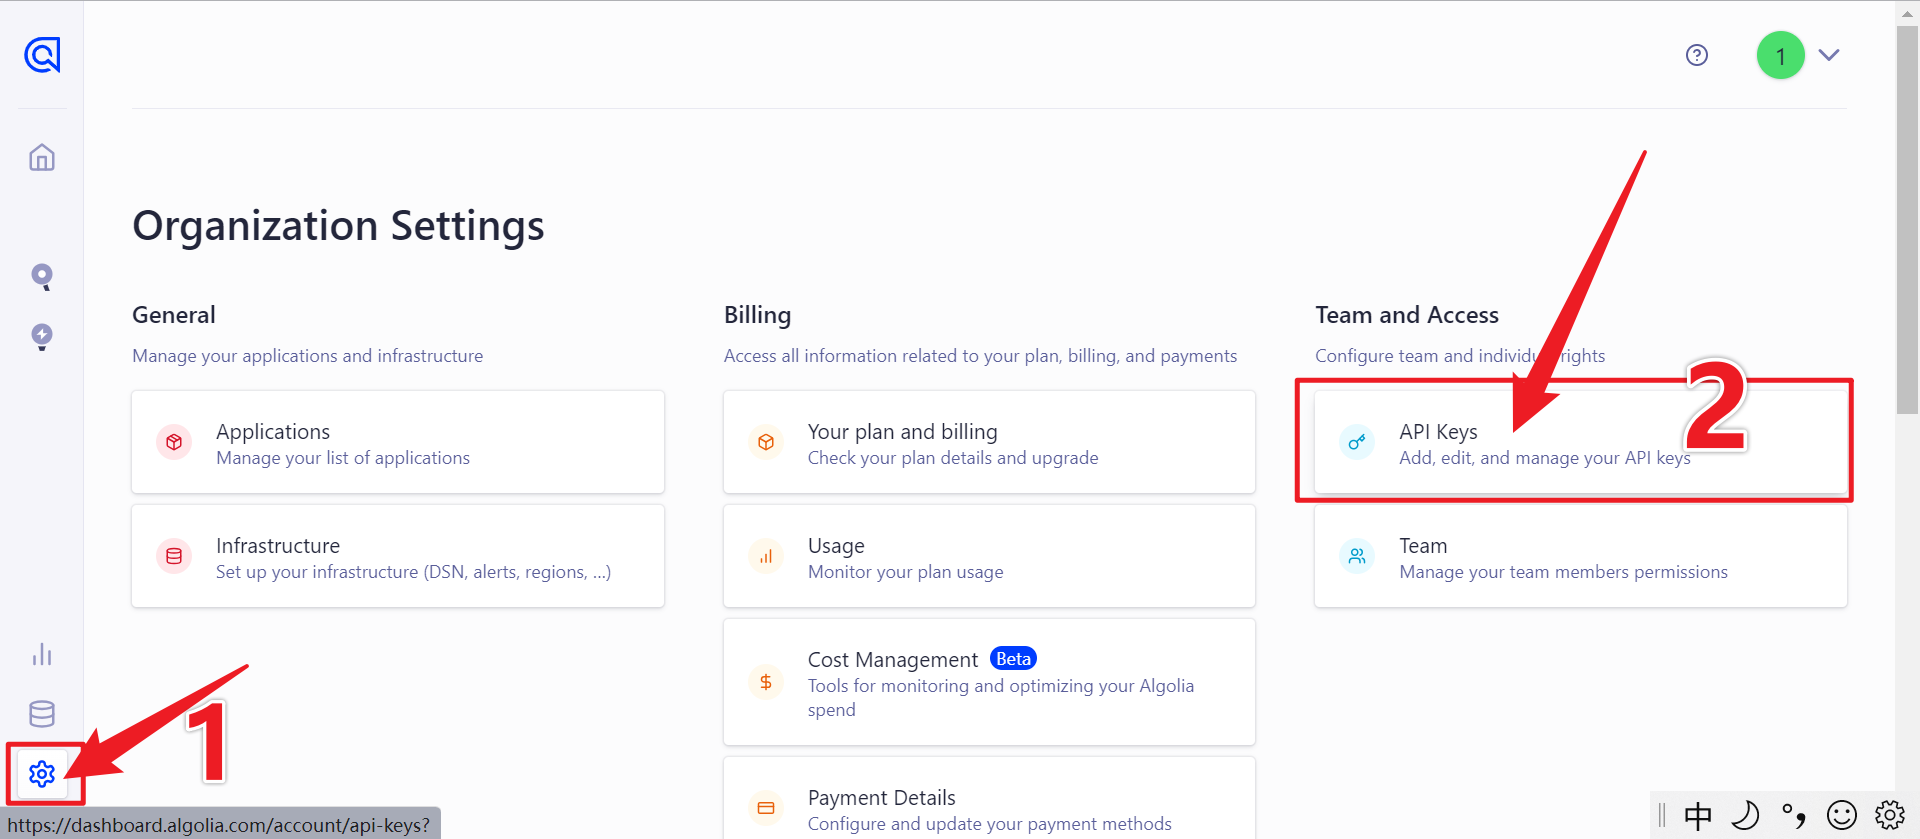
打开 docusaurus.config.js ,修改之前 algolia:{} 中的 appID 、 apiKey 和 indexName 。
这里会有很多个 key ,algolia:{} 中的 apiKey ,用 Search API Key
indexName 就是你新建 index 时自己取得名字
也可以点击左边的 search ,在这里找到 index name
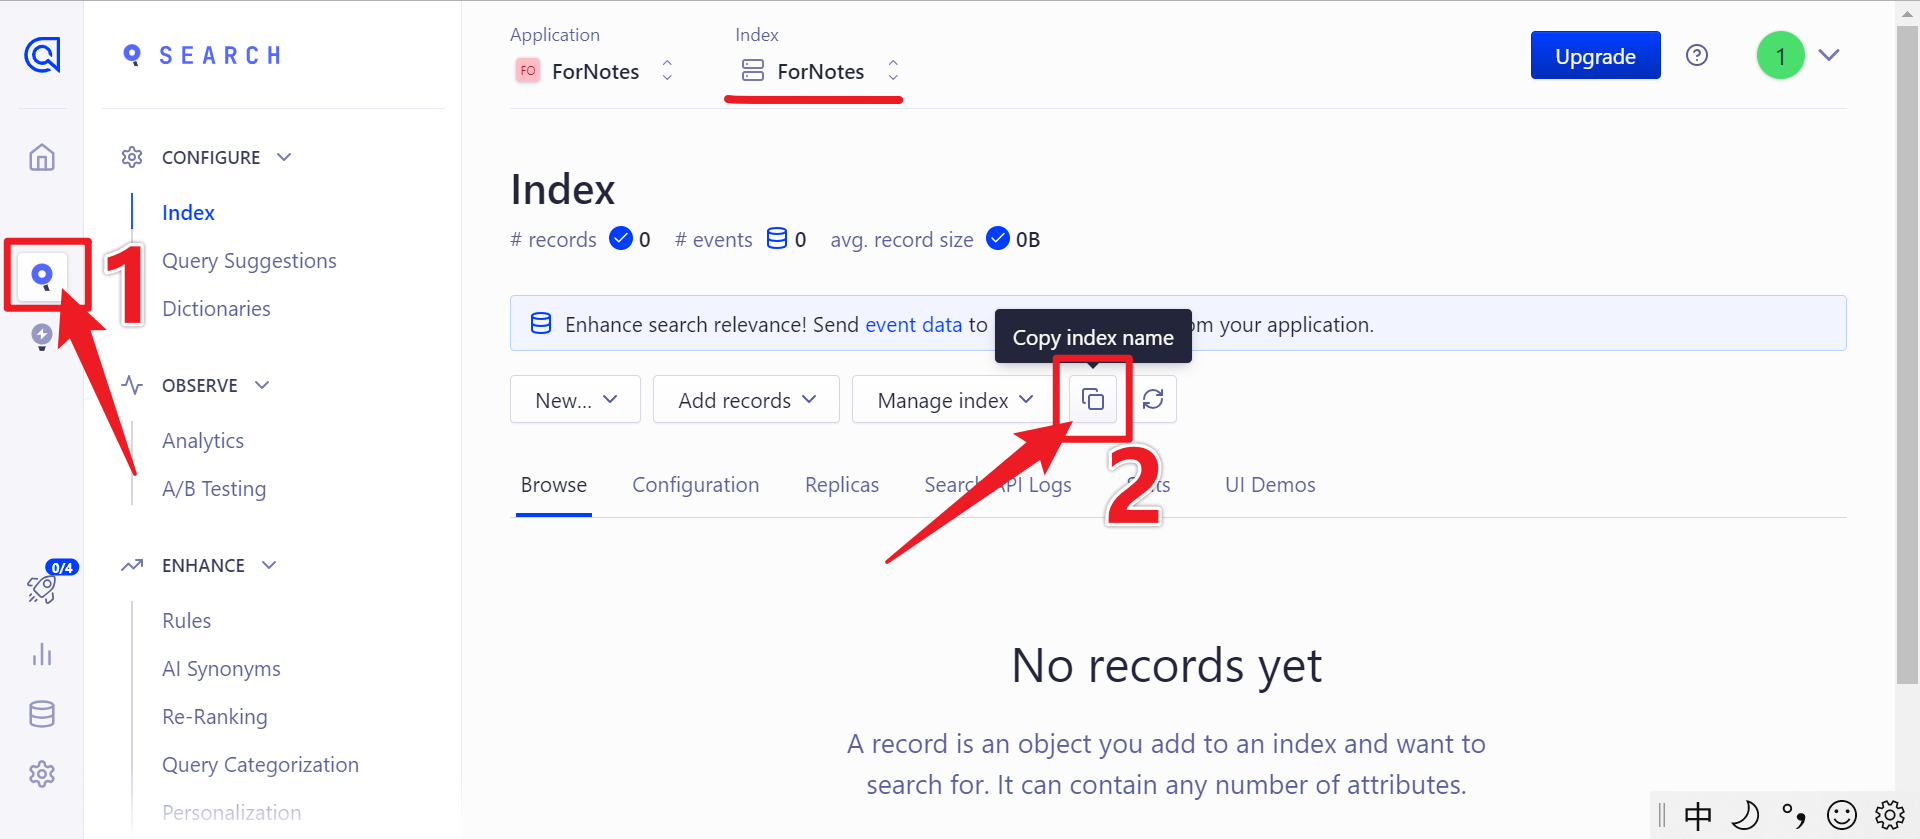
4. 配置爬虫
1. 设置 .env(环境变量)
在项目根目录里新建个文本文档,名字空着什么也不写,扩展名改为
.env接着用记事本打开它,把下面的代码复制进去
.envAPPLICATION_ID=YOUR_APP_ID
API_KEY=YOUR_API_KEY切回 Algolia ,用 4. 获取 appID、apiKey(点我跳转) 中的方法,找到 appID 和 apiKey
注意.env 中的 apiKey 要用 Admin API Key
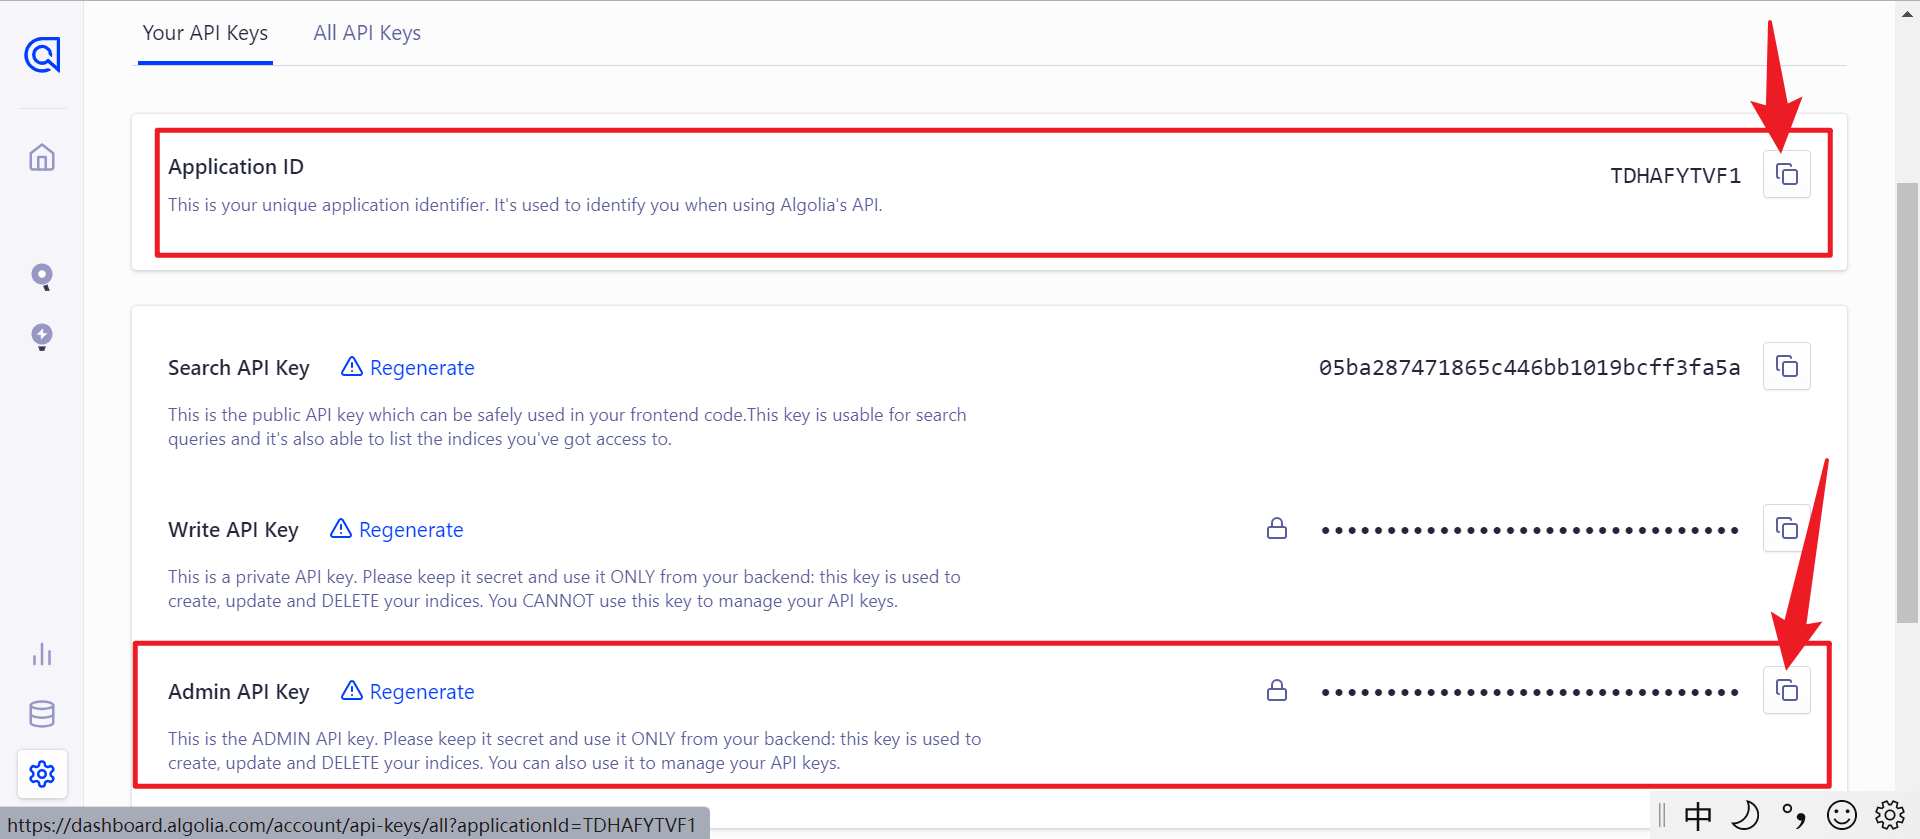
记得把 .env 文件添加到 .ignore 里,不要上传到 Github 上
2. 配置爬虫规则
在项目根目录里新建个文本文档,名字和扩展名改为
config.json,并把下面代码复制粘贴进去其中高亮的三行需要修改
config.json{
"index_name": "YOUR_INDEX_NAME",
"start_urls": ["https://YOUR_WEBSITE_URL"],
"sitemap_urls": ["https://YOUR_WEBSITE_URL/sitemap.xml"],
"sitemap_alternate_links": true,
"selectors": {
"lvl0": {
"selector": "(//ul[contains(@class,'menu__list')]//a[contains(@class, 'menu__link menu__link--sublist menu__link--active')]/text() | //nav[contains(@class, 'navbar')]//a[contains(@class, 'navbar__link--active')]/text())[last()]",
"type": "xpath",
"global": true,
"default_value": "Documentation"
},
"lvl1": "header h1",
"lvl2": "article h2",
"lvl3": "article h3",
"lvl4": "article h4",
"lvl5": "article h5, article td:first-child",
"lvl6": "article h6",
"text": "article p, article li, article td:last-child"
},
"strip_chars": " .,;:#",
"custom_settings": {
"separatorsToIndex": "_",
"attributesForFaceting": ["language", "version", "type", "docusaurus_tag"],
"attributesToRetrieve": [
"hierarchy",
"content",
"anchor",
"url",
"url_without_anchor",
"type"
]
},
"conversation_id": ["833762294"],
"nb_hits": 46250
}第一个 index_name 不必说了,第二个 "start_urls" 和第三个 "sitemap_urls" 中 "/sitemap.xml" 之前的内容是你的网站地址
以我为例,我原先用的是 "https://ratherthan17.github.io/notes/" ,这两处填这个地址
后来买了个域名,现在是 "https://xxx.zhangyuqi.top" ,这时这里填这个地址。
你部署到 github pages 时,docusaurus.config.js 中的 url + baseUrl 是啥,这两处就填啥
docusaurus.config.js...
const config = {
title: 'Zhang的知识库',
tagline: 'Dinosaurs are cool',
favicon: 'img/LogoIcon/WebIcon.png',//这个是标签页的图标
// Set the production url of your site here
url: 'https://xxx.zhangyuqi.top',//看下一行
//当部署到 github pages 上时,用 https://xxx.zhangyuqi.top
//上传到 main 分支时用 https://www.zhangyuqi.top ,这是我的 vercel 用的域名
//不用域名是 https://Ratherthan17.github.io
// Set the /<baseUrl>/ pathname under which your site is served
// For GitHub pages deployment, it is often '/<projectName>/'
baseUrl: '/',//这个不用动//github.io 是 '/notes/'
...
}
...
3. 安装 Docker Desktop 及 jq(json解析器)
这个软件安装完后,会有一个按钮是 Close And Restart ,先别点!它说的 Restart 是重启电脑,而不是重启它这个软件!可恶!
安装 jq 前,先安装 chocolatey ,以管理员身份运行 CMD ,执行下面命令:
cmd@"%SystemRoot%\System32\WindowsPowerShell\v1.0\powershell.exe" -NoProfile -InputFormat None -ExecutionPolicy Bypass -Command "iex ((New-Object System.Net.WebClient).DownloadString('https://chocolatey.org/install.ps1'))" && SET "PATH=%PATH%;%ALLUSERSPROFILE%\chocolatey\bin"之后就可以用 chocolatey 安装 jq 了。关闭之前的 CMD ,重新打开一个,还是以管理员身份运行,执行下面代码
cmdchoco install jq如果安着安着停了,问你 yes or no , 按 y,回车
5. 运行爬虫
首先确定 Docker Desktop 正在运行,然后对网站文件夹右键 -> Open Git Bash here ,用 git bash 打开,然后执行下面的命令
gitdocker run -it --env-file=.env -e "CONFIG=$(cat ./config.json | jq -r tostring)" algolia/docsearch-scraper如果爬取失败,错误信息中有什么 winpty ,就换成下面的命令
gitwinpty docker run -it --env-file=.env -e "CONFIG=$(cat ./config.json | jq -r tostring)" algolia/docsearch-scraper如果爬取成功,git bash 会显示 > DocSearch: https://网址 xx records)
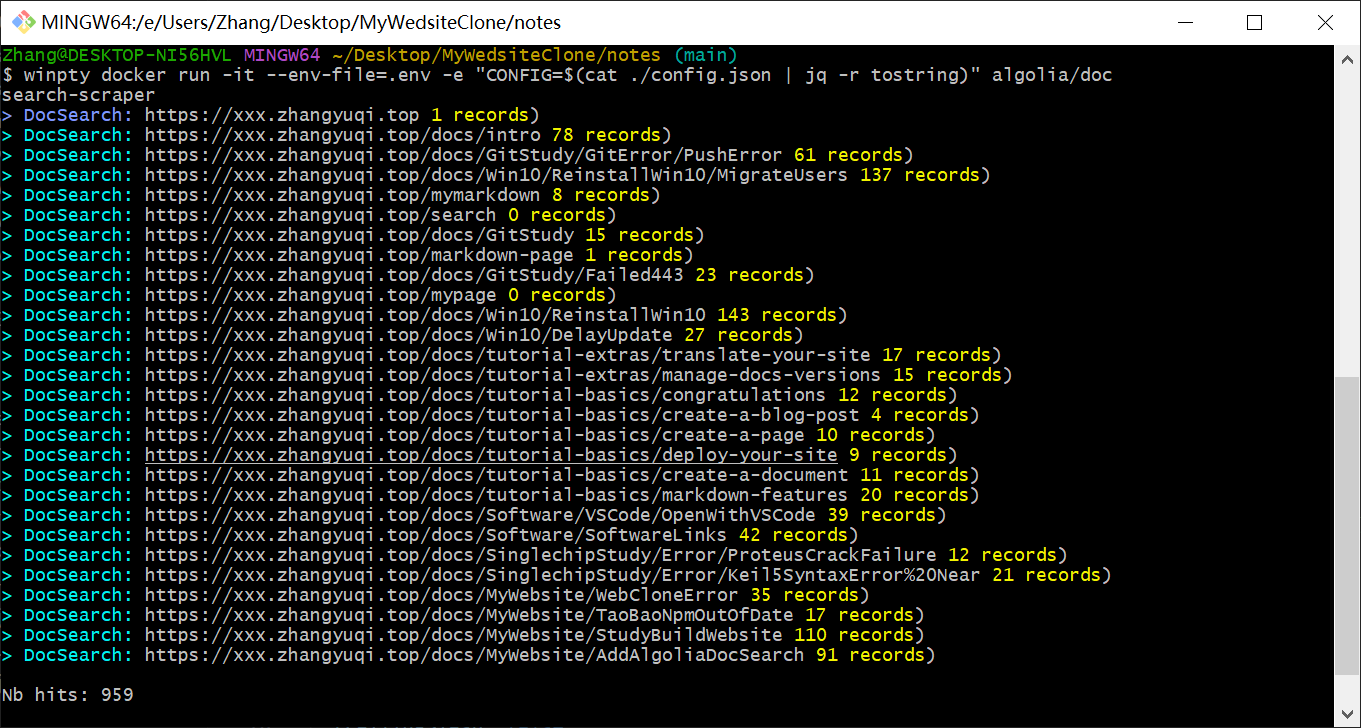
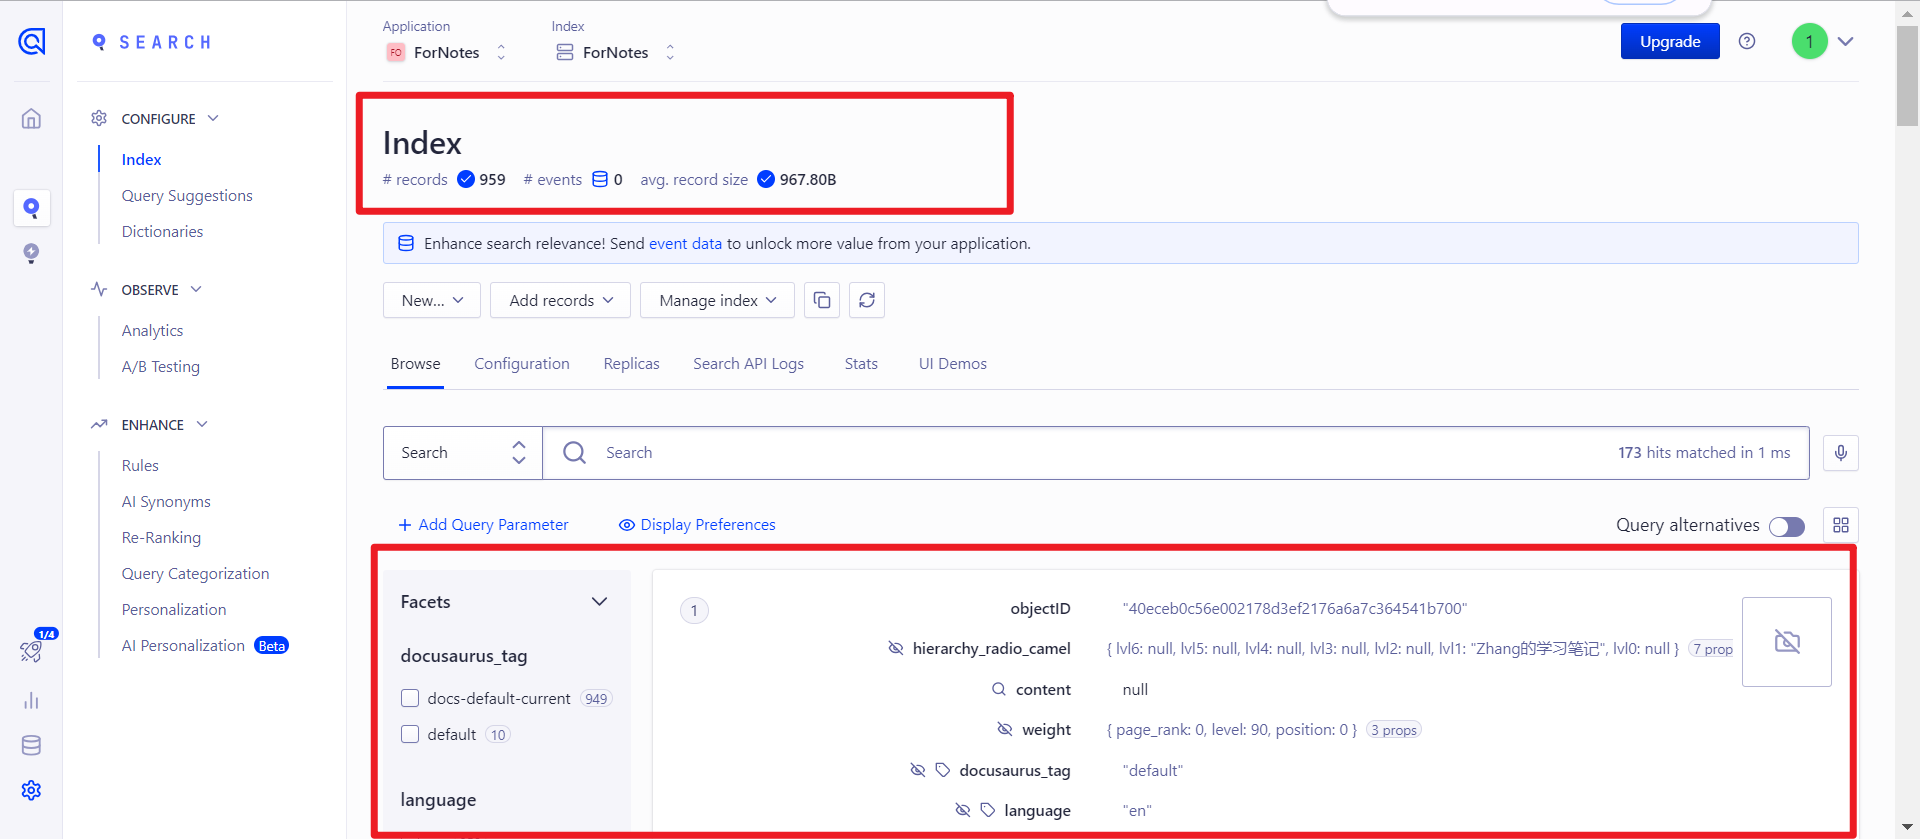
回到 Algolia 中的 Search ,可以看到多了许多内容
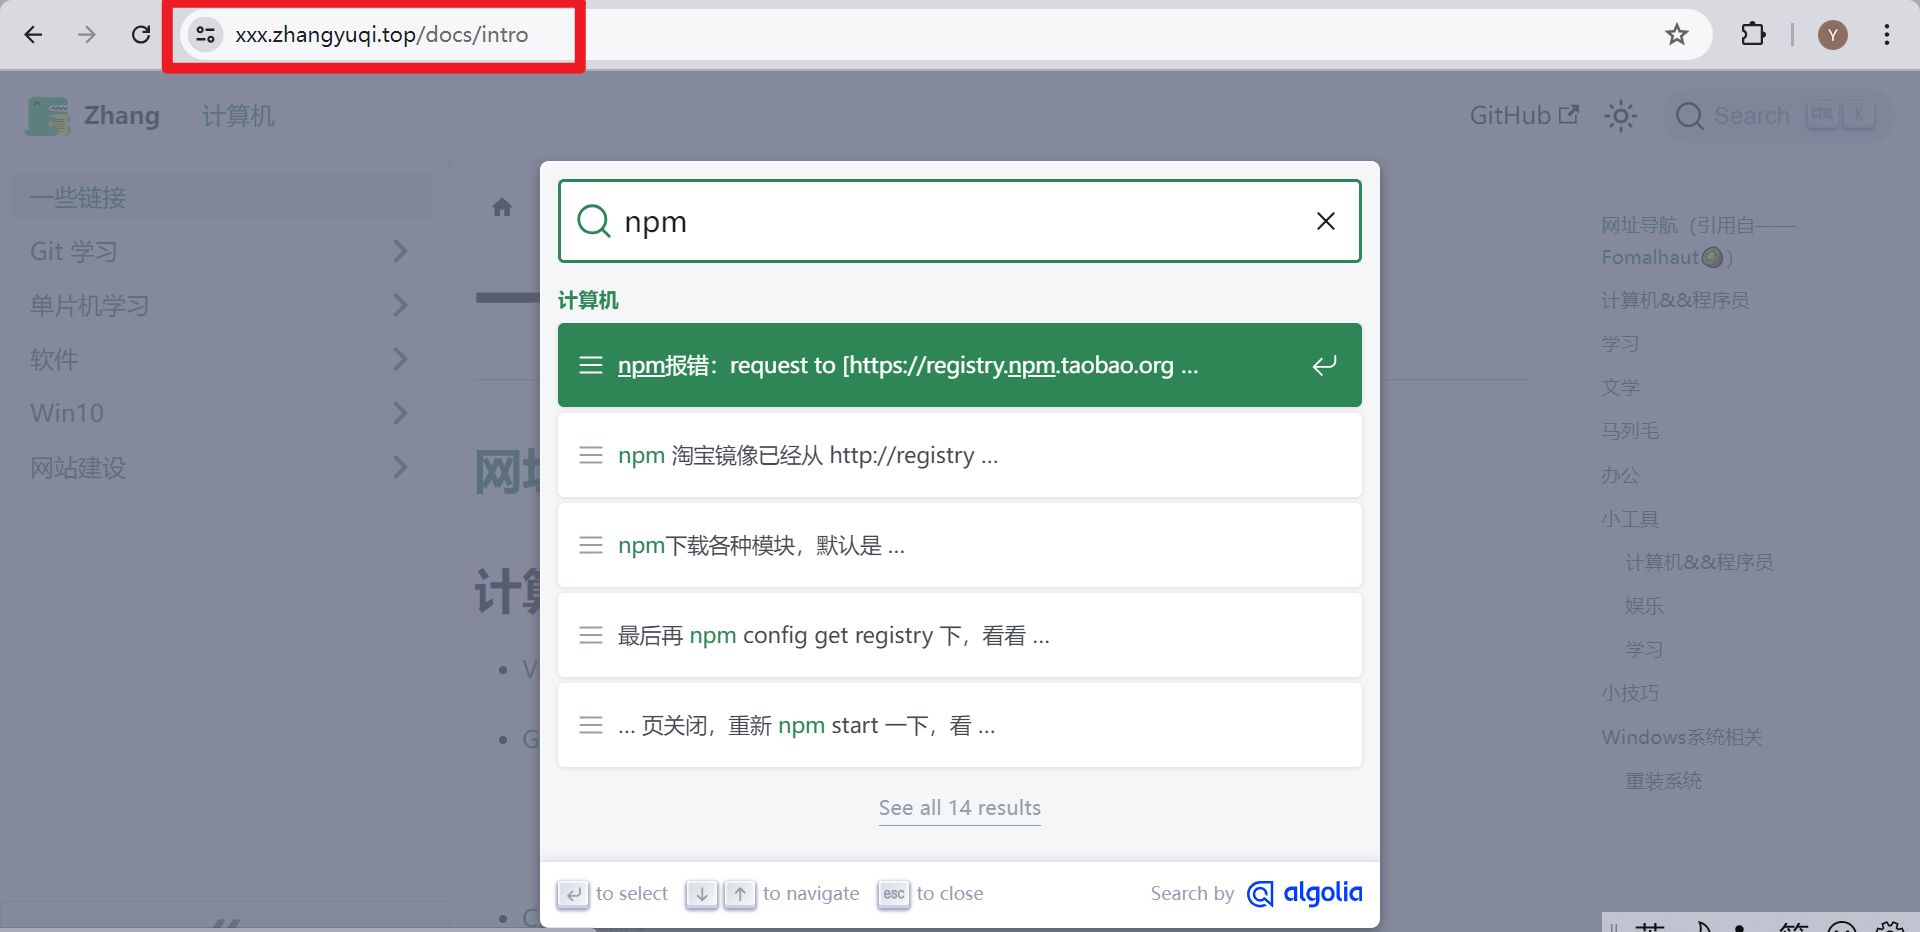
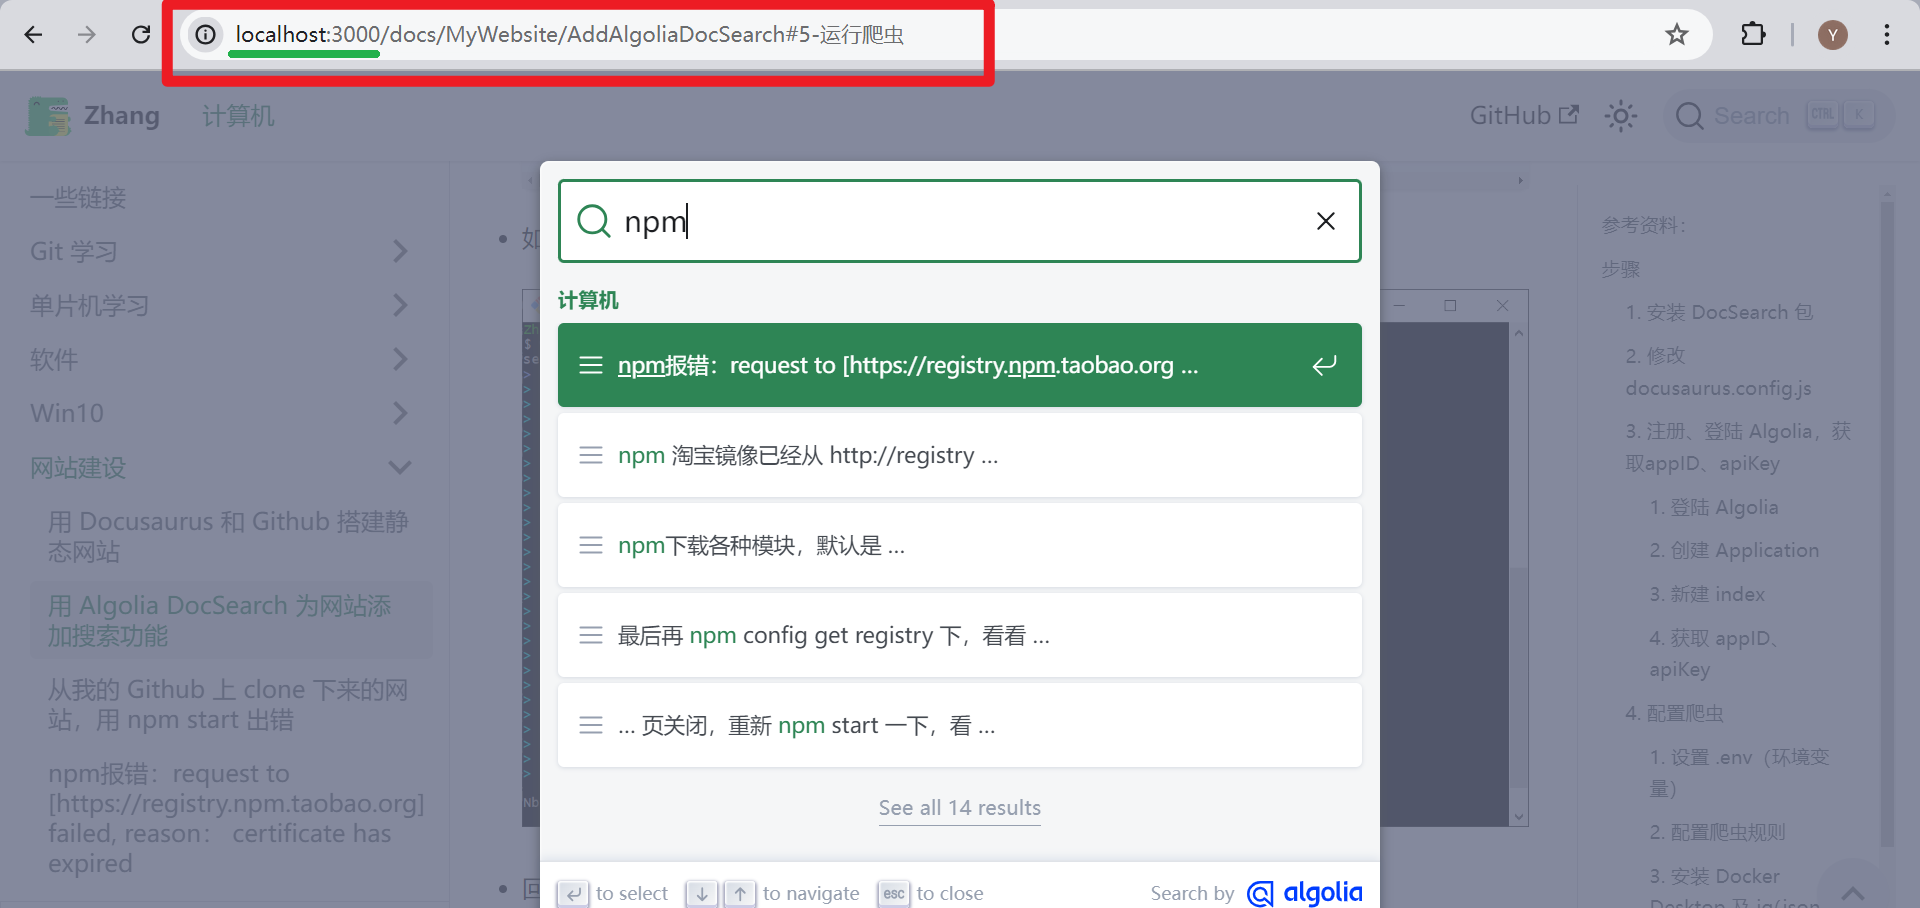
打开网站,点击搜索框,可以搜索到东西了
在本地运行的那个 localhost:3000 ,也可以搜索
错误
1. 申请给的 Application 无用
1. 不能用自定义域名
我一开始照着 Dacusaurus 官方文档中的指南 -> 搜索一节,做了 Algolia 申请 ,通过后给我发了俩邮件,默认给我建了个名为 github账户名io 的应用,第二封邮件中还有这个应用的 appID、appKey 和 indexName
我用他们的 Algolia Crawler 爬取了半天,显示爬取成功,但网站就是搜不了东西
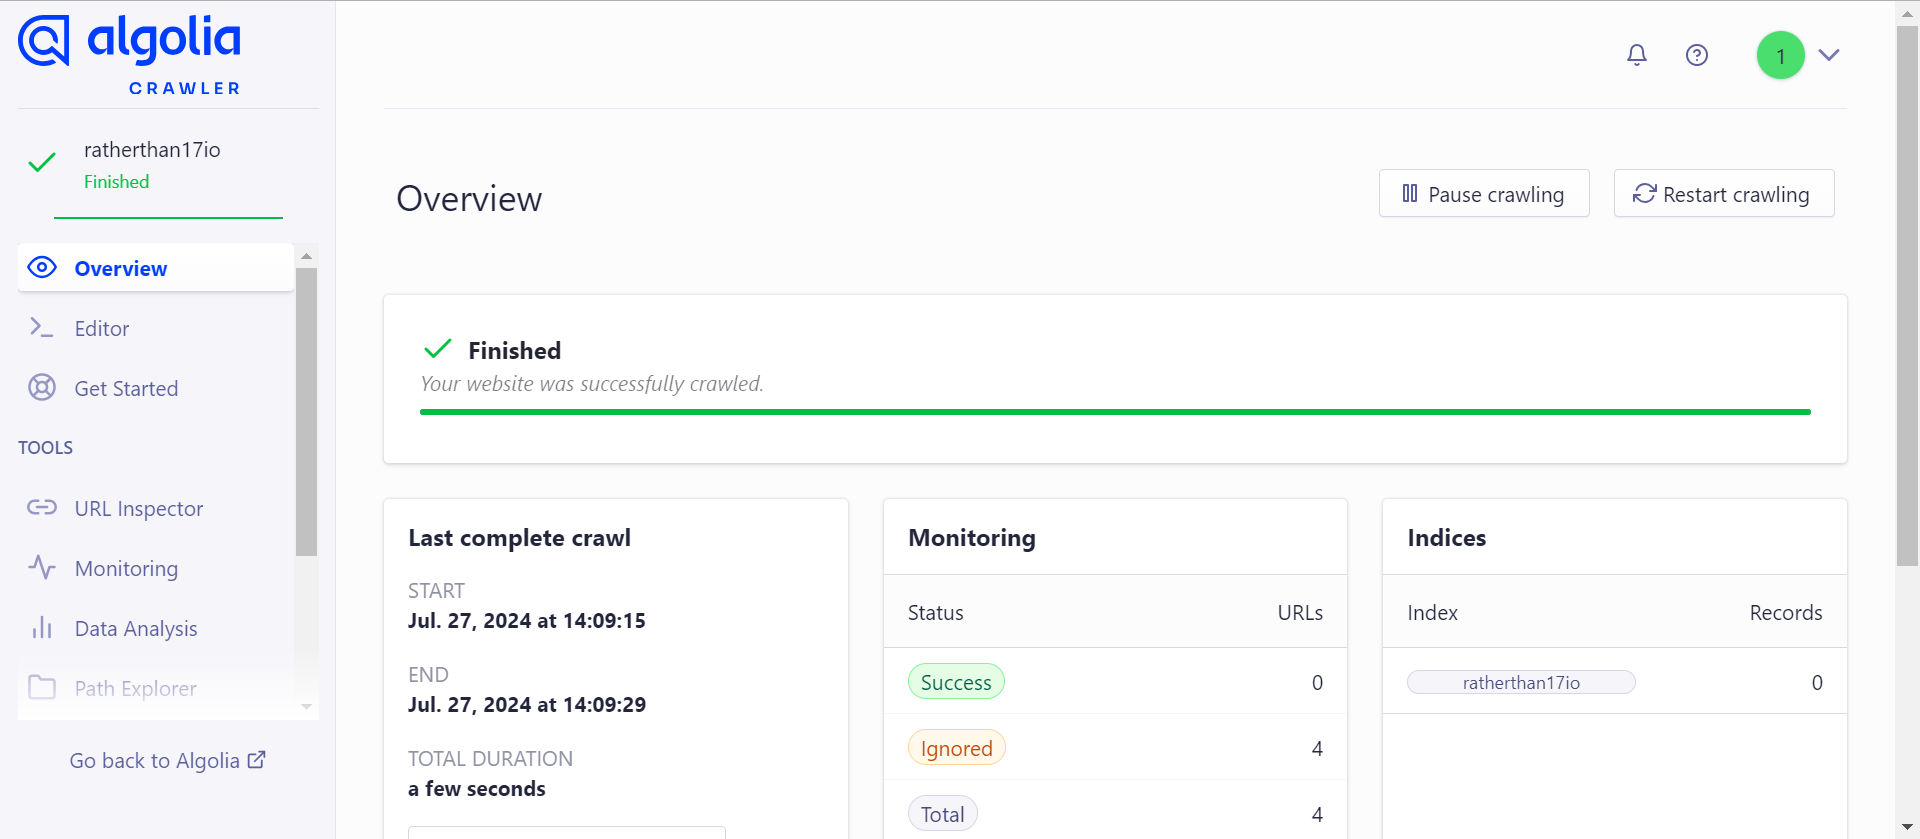
最后我在左边导航栏的 URL Inspector 发现我的网站被忽视了,忽视原因是 ratherthan17.github.io 这个域名会重定向到我的自定义域名 xxx.zhangyuqi.top 上,
上面的图中 Success 是 0 ,Ignored 是 4 ,我一开始没注意到,被 Finished 迷惑了
而我自定义的域名不被允许

于是我回到主页面想把我的域名添加上,结果不让加

最后,我只能手动跑爬虫上传到 Algolia
2. 没有 Admin API Key
手动跑爬虫的配置过程中,有一步是建一个 .env 文件,里面需要 Admin API Key ,而申请给的那个应用的 app Keys 里没有这个 key ,我用 Write API Key 代替,结果最终爬取的时候老报错
所以申请给的这个 Appliction 毫无用处,还是得重新建一个
2. 爬取 Vercel 托管的网站,只会爬取主页这一个
- 同一个仓库项目,部署到 github pages (gh-pages分支)的就可以爬取,而用 main 分支部署的 Vercel 就不行

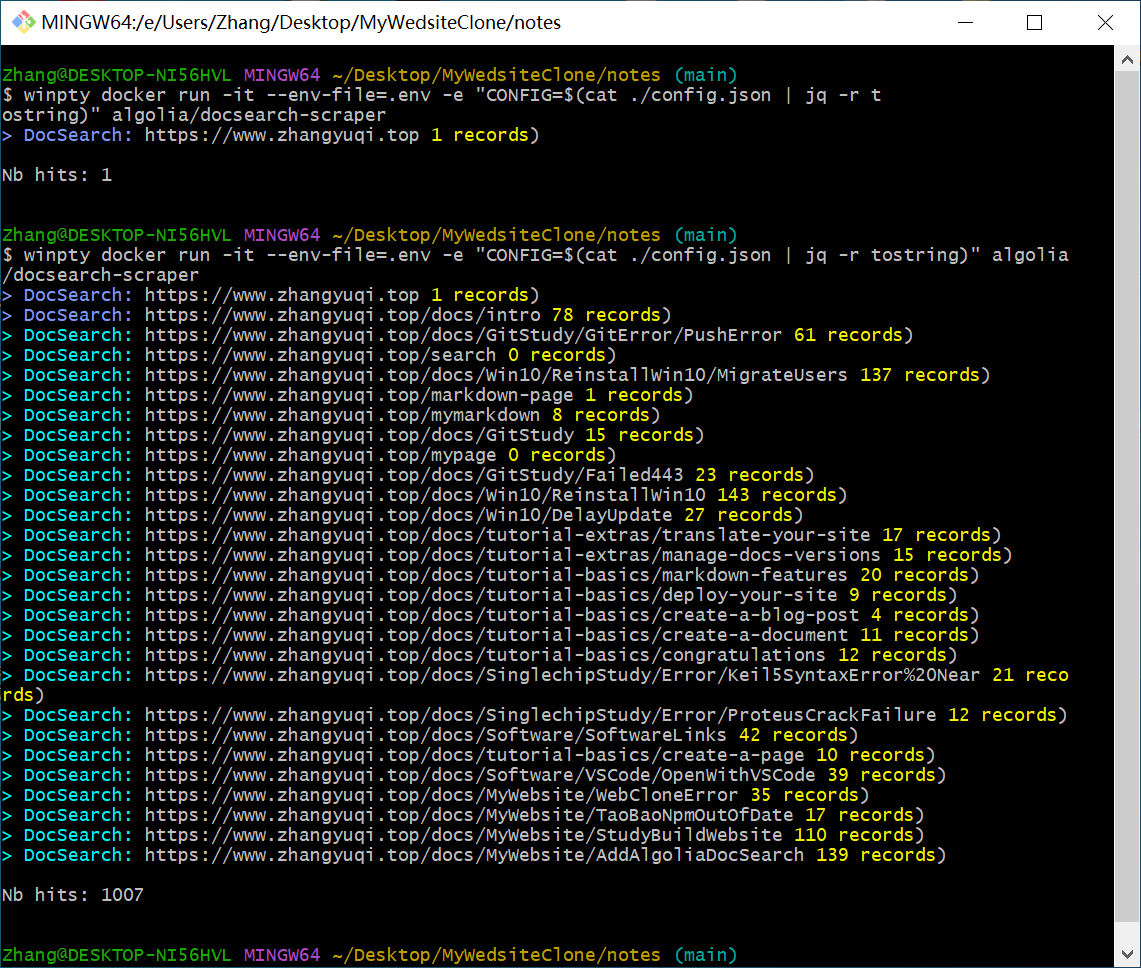
别看我图中用的是自定义的域名,就算是用 Vercel 给的那一长串域名,同样是只爬主页这一个
解决办法:在项目根目录里新建一个 vercel.json ,把下面的代码复制进去
vercel.json{
"rewrites": [
{ "source": "/(.*)", "destination": "https://xxx.zhangyuqi.top/$1" }
]
}把 “xxx.zhangyuqi.top” 改成你的 github pages 用的域名
效果
另外如果是同一个项目的话,不用为 Vercel 再次新建一个 Application ,可以还用这一个,只需新建一个 index 就行了。
- 部署到 github pages 和 推送到 main 分支时,只需要改一下 docusaurus.config.js 里的 URL 、index
- 以及 config.json 里的 index_name、start_urls 和 sitemap_urls 就行了
- 不用改 appID 和 appKey